DIY photography
How to Take a Professional Headshot at Home
Face a window, set your phone at eye level and use the timer to take a few sharp head-and-shoulders portraits. Keep the full-size original and export a separate crop for each profile.
By SnapHead ·
Set up a phone headshot in a small room
Choose the window first. Stand facing it with the phone between you and the glass. If sunlight makes you squint or casts a sharp shadow, move away from the beam or close a sheer curtain. At night, use a lamp with a shade slightly above eye level and turn off any overhead light that puts your eyes in shadow. Take one test photo and check whether you can see detail in both eyes.
Put a plain wall behind you and move forward as far as the room allows. A little separation softens wall texture and keeps your shadow off the backdrop. Test your outfit against the wall on screen. If a white top blends into a light wall, try a darker layer. If you are against a dark backdrop, check that the outline of your hair and shoulders is still visible.
Support the phone on a tripod, shelf or stack of books. Put the lens at eye height and step back until you have headroom and both shoulders in the frame. Use the regular camera view instead of an ultra-wide setting. If your nose or forehead looks exaggerated, move the phone farther away and crop afterward. Use the rear camera if you can frame it reliably. A sharp front-camera photo works if you are shooting alone.
Take a short set with three expressions
- Start straight on. Stand or sit upright, relax your shoulders and look at the lens. Keep your chin level and take a neutral shot. Use the timer so you can reset your posture after touching the phone.
- Turn your shoulders slightly. Keep your face toward the camera. Make a small change, then compare the shoulder lines. Keep the version that feels natural for the role where the portrait will appear.
- Try a quiet smile and a warmer one. Exhale just before the shutter. Take several frames with each expression, then choose the one that looks like you in conversation.
- Inspect before you pack up. Zoom in on the eyes. Retake anything soft, overexposed or hidden by glasses glare. If a reflection crosses your pupils, turn your body slightly or move the light to one side, then look back at the lens.
Wear a solid top you would plausibly wear in a meeting or on a client call. Check the collar, neckline and visible shoulders in the first frame. If the pattern is the first thing you see at thumbnail size, choose a quieter layer. The headshot wardrobe guide has more ideas by setting.
Crop for LinkedIn and save an uncropped master
Keep the highest-resolution original. Make a separate square for profile photos and preview the crop as a circle. Center your face with a little room above your hair and below your chin. For a website bio or speaker page, keep a looser copy so the organizer can place it in a tall frame or beside a name. Give each file a recognizable name, such as alex-chen-profile-square.jpg.
LinkedIn accepts JPG or PNG up to 8 MB and lists 400 × 400 pixels as the minimum profile-photo dimensions. It also asks that the image reflect your likeness. LinkedIn profile photo requirements
Check the result at the size a reader will see it. Open it on your phone, shrink it to avatar size and look away for a moment. If you see a bright wall or a logo before you see your face, crop a little tighter or select a quieter frame. Adjust exposure or white balance gently, then compare the edited version to the original to check that your skin and hair still look familiar.
Use the phone photo as-is or as an AI reference
Use the phone photo directly if the light is even, the background works and you already like your outfit. A simple portrait taken in the room where you work can suit a personal site or an informal staff directory. Try an AI preview if you have a sharp reference and want to compare different wardrobes or settings. Start with the clearest, most current image you took, with your face fully visible. Selfie preparation for AI headshots
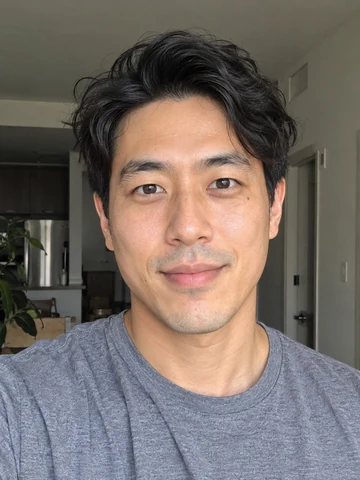 Reference
 AI result
Review a generated portrait in two passes. First, shrink it and judge the crop, expression and recognizability. Then zoom in and inspect the glasses, hairline, teeth, ears, jewelry and clothing seams. If you would need to explain why the portrait looks different in person, use another preview or publish the original phone photo. When you need an exact uniform, an existing brand background or repeatable studio lighting, bring those requirements to a photographer.
At-home headshot questions
- Can I take a professional headshot without a tripod?
- Yes. Prop the phone securely on a stable surface at eye level and use the timer. Mark where you stood so you can step back into the same light.
- How can I tell if the lighting is too harsh?
- Look for squinting, a sharp shadow from your nose or a forehead highlight with no visible texture. Move into indirect light and take another test frame.
- Should I use portrait mode?
- Take one regular photo first. If portrait mode softens parts of your hair, glasses or shoulders along with the background, use the regular frame.
Try an individual SnapHead preview
Start with one clear selfie and preview 3 watermarked headshots free. If you find a photo you would use, pay $29 once to unlock all 24 full-resolution headshots.
Preview 3 headshots free